Feeds:
Posts
Comments

Blackened Chicken Pizza

blackened-chicken-pizza

Difficulty: Easy

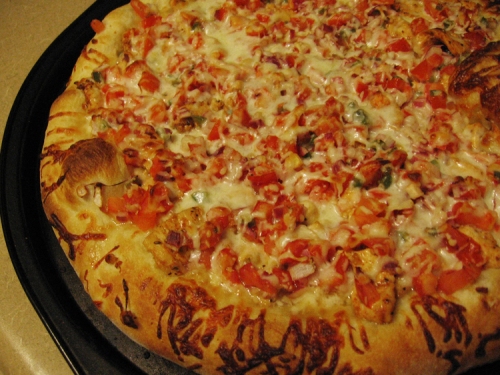
We love pizza! This is a hearty meal in itself, a wonderful crust of your choice, loaded with flavorful chicken, a fresh tomato salsa and cheese. We get our pizza dough from our local grocery store and it rolls out to be almost an extra-large, you can find fresh dough at your local pizzaria, if your grocery store carries them or sometimes in the frozen aisle. Or use a favorite recipe. Adapted from Rachael Ray.

Ingredients
1 fresh dough ball
All-purpose flour, a couple of tablespoons to work dough
1 tablespoon grill seasoning
1 teaspoon sweet paprika
1 teaspoon chili powder
Pinch dried cayenne pepper
2 boneless, skinless chicken breasts, pounded out to even thickness, about 1/2-inch thick
1 tablespoon vegetable oil

2 cups shredded Cheddar with jalapeno or chipotle pepper or mozzarella cheese (use the latter if you want to tone down the heat factor)
2 medium tomatoes, seeded and chopped
1/2 cup red onion, chopped
1 small-medium jalapeno pepper, seeded and finely chopped
2 tablespoons cilantro leaves
2 cloves garlic, minced
Coarse salt
1/2 lime, zested and juiced

Directions: Preheat a large heavy skillet over very high heat. Preheat oven to 450 degrees.

Combine grill seasoning, paprika, chili powder, cayenne pepper and place on a plate, press chicken breasts into seasonings on one side. Add oil to screaming hot pan and cook chicken 2 minutes on each side, chicken will not be cooked through but will finish in the oven.

Spread out a little flour or and stretch out pizza dough onto a pizza pan to desired size and thickness.

Remove chicken from pan and slice into thin strips. Combine tomatoes, onion, jalapeno, and cilantro. Make garlic paste by mashing it with the flat of your knife and a generous pinch of coarse salt. Add paste to salsa. Add zest and juice of 1/2 lime and mix salsa thoroughly. Scatter chicken, salsa and cheese over pizza dough working to the edges of pizza. Bake 12 to 15 minutes, until crisp and bubbly-brown on top. Remove from oven, let cool 5-10 minutes, cut into slices and devour.
Roast Pork Loin

roast-pork-loin

Difficulty: Easy

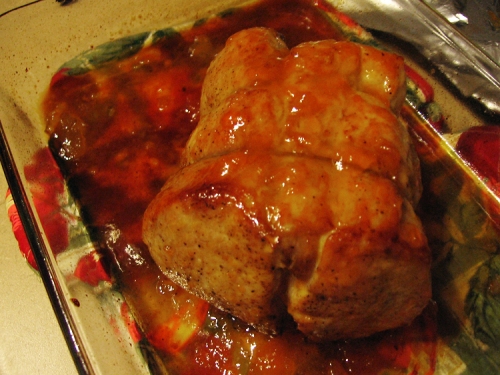
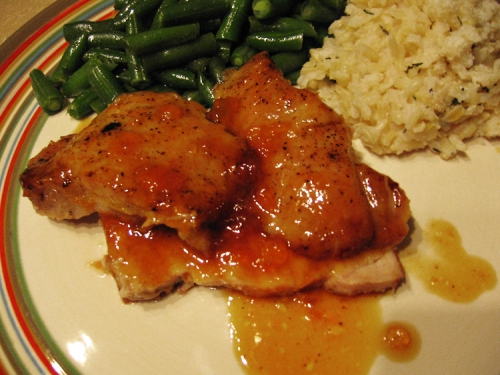
What is easier or tastier that a juicy pork loin, perfectly roasted and then topped with a sweet, flavorful glaze? Not much! The pork is brined in a salt water mixture and will guarantee juicy, tender and flavorful meat every time. If your pork is enhanced already, do not brine. You may choose any glaze you like, we love the flavor combinations of the pork and sweet apricots, but a cherry glaze, cranberry- orange or apple would be fantastic as well. A classic meal that is easily rounded out with a few simple sides, we served pan sauteed green beans and a brown rice with lemon, thyme and Parmesan. So good, so simple with fantastic flavors.
Serves 8.

Ingredients
1 (3-pound) boneless pork loin, tied at even intervals
Salt and pepper
1 TBS vegetable oil
1 cup apricot jam
2 TBS lemon juice
1/2 cup water, separated

Salt water brine
3 TBS table salt
3 TBS sugar
2 quarts water

Directions:Dissolve salt and sugar into 2 quarts water in a large bowl (one that can accommodate the roast and brine). Submerge the meat completely in the brine, cover and refrigerate for 1 hour. Remove the meat, rinse, pat dry, trim off any excess fat or silver skin and tie with kitchen twine at even intervals if your meat did not come tied from the butcher. Let pork sit at room temperature, covered, for 30 minutes or up to 1 hour prior to roasting.

Heat oven to 375 degrees. Pat the pork down with paper towels again and season generously with salt and pepper. Heat vegetable oil in a large skillet or dutch oven over medium-high heat until just smoking. Brown the roast on all sides, about 10 minutes. Transfer meat to a 13×9-inch baking dish.

Roast pork until the center registers 135 degrees in an instant-read thermometer, 50-70 minutes, flipping it over halfway through the roasting time. Prepare glaze if using when there is 20 minutes left of roasting. Combine jam, lemon juice and 1/4 cup water in small saucepan over medium heat. Stir until hot and glaze has thinned. During the last 15 minutes of roasting, brush the glaze over the pork, add remaining 1/4 cup water to bottom of pan to prevent burning.

Remove from oven, cover pork with foil and let rest for 5-10 minutes, until internal temperature reaches 145-150 degrees. Remove the twine and cut into 1-4-inch thick slices. Spoon additional glaze over meat.

roast-pork-loin-2

Oven “Fried” Chicken

oven-fried-chicken

Difficulty: Easy

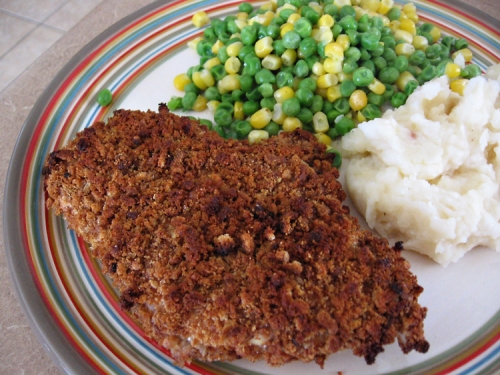
I love fried chicken, who doesn’t right? But in efforts to be healthy we tried this alternative. Granted it is no KFC or your grandma’s true fried chicken but it is still moist, flavorful and has a nice crispy crust. As you can tell, we served this meal with mashed potatoes and veggies but Phil & I both agreed we needed something wet, coleslaw will be our next accompaniment. This recipe serves 4 but our chicken breasts were mammoth and you could easily feed 8 if you cut them in half and stay true to real portion sizes, or just use regular sized chicken breasts or cutlets would be nice too.

Ingredients
1 box plain Melba toast, broken into 1-inch pieces
2 TBS vegetable oil
2 eggs, beaten
1 TBS Dijon mustard
2 tsp fresh thyme leaves, minced
2 cloves garlic, minced
1 tsp onion powder
A few dashes of Tabasco sauce, to taste
4 boneless, skinless chicken breasts
Salt and pepper
Vegetable oil cooking spray

Directions: Heat oven to 450 degrees. Cover a rimmed baking sheet with foil and place a wire rack on top. Pulse the Melba toast in a food processor until coarse crumbs form. Spread the crumbs in a shallow dish and toss with the vegetable oil, 1/2 tsp table salt (or 1 tsp kosher salt) and 1/4 tsp pepper.

In a separate shallow dish, whisk eggs, mustard, thyme leaves, garlic, onion powder and hot sauce together. Pat chicken dry with paper towels, season generously with salt and pepper (I am always using kosher salt). Dip one chicken piece at a time into egg mixture and then coat with the Melba crumbs. Press on the crumbs to make sure they adhere and lay the chicken on the wire rack and spray the top with cooking spray. Repeat with remaining chicken breasts.

Bake until the coating is golden brown, the chicken is no longer pink and the thickest part registers 150 degrees in a instant-read thermometer, about 25 minutes. Serve immediately.

Classic Brownies

brownies

Difficulty: Moderate (but not really)

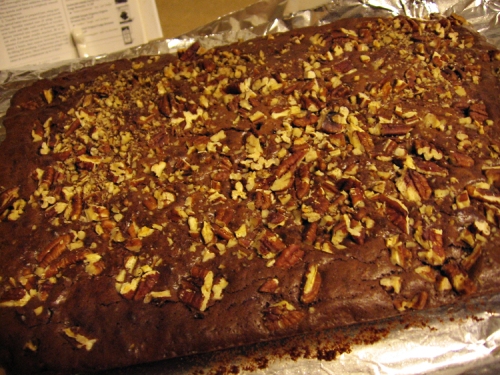
Moderate? Yes, I suppose since it’s not as easy as dumping a mix into a bowl but who really likes those brownies anyway? (My husband does! But he admits these are better. )  I, for one, am not a fan. Once again, my complaint with anything boxed is the lack of true chocolate flavor, plus the structure and texture of box brownies is downright awful. They are mushy and taste commercial. Well, becuase they are commercial. This recipe is mildly adapted from whom I consider the gold standard; Cook’s Illustrated. Love them. Try these babies from scratch, I promise you’ll never go back. And if you do, you’ll regret it, or at least admit these are infinitely better. These are brownie perfection; chocolatey, moist and is neither cakey nor fudgy.

I wanted to get a better picture of the brownies cut and in their full delicious glory, but it was dark and we ate them. Yes, all of them, but not that night. We had guests to help us and then I never got around to it as we polished off the leftovers in subsequent days.

Makes 24 2-inch brownies (1 9×13-inch pan)

Note: Be sure to test the doneness of the brownies before removing from the oven. If underbaked (the toothpick has batter clinging to it), the texture will be dense and gummy (bad); if overbaked (toothpick comes out completely clean), the brownies will be dry and cakey.

Ingredients
1 cup pecans, chopped
1 1/4 cups flour
1/2 tsp salt
3/4 tsp baking powder
6 oz. unsweetened chocolate, chopped fine
12 TBS (1 1/2 sticks) butter, cut into 6 pieces
2 1/4 cups sugar
4 eggs
1 TBS vanilla

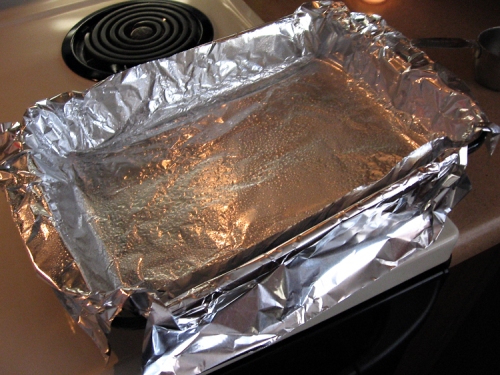
Directions: Heat oven to 325 degrees. Line 13×9 baking dish with foil both lengthwise and widthwise(perpendicular to each other), pusing it into the corners and up the sides of the pan, leaving some to hang over the edges so you will be able to easily lift the brownies out of the pan once baked. Spray with cooking spray.

brownies-foil

Whisk flour, salt and baking powder in a large bowl and set aside. Melt chocolate and butter in a medium saucepan over medium-low heat, stirring occasionally until melted and smooth. Remove from heat and slowly whisk in sugar. Add eggs, stirring after each addition. Add vanilla. Pour warm chocolate mixture over flour and fold with spatula until batter is completely smooth. Pour batter into prepared pan and sprinkle top evenly with chopped nuts if using. (You should use them.)

Bake until a toothpick instered in the center comes out with a few moist and yummy crumbs attached, 30-35 minutes. Cool on wire rack until room temperature and then life brownies out of pan using foil handles. Cut into squares and serve. Or if you can’t wait, cool for 15 minutes or so, dig in and make a lovely brownie sundae or enjoy with a cold glass of milk. Delish!

Kung Pao Shrimp

kung-pao-shrimp

Difficulty: Moderate

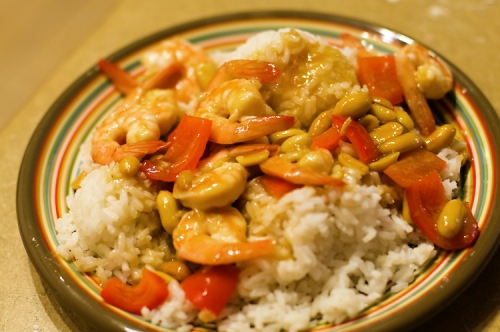
Kung Pao! Isn’t that fun to say? A wonderful quick and easy dish to pull off during a weeknight, full of tasty and tender shrimp, a bit of heat, crunchy peanuts and a fabulous silky sauce. I rate it moderate due to the ingredients, most I have on hand but if you do not cook Asian meals often you may require a trip to the grocery store, (look in the international section). Have all the ingredients prepped and ready to go as this stir-fry comes together quickly. Serve with steamed rice or lo mein noodles.

Ingredients
1 cup chicken broth
3 TBS oyster sauce
2 tsp Tabasco sauce (it is not that hot, so rest easy)
2 tsp corn starch
1 TBS hoisin sauce
2 tsp sesame oil
2 tsp rice wine vinegar

1 pound extra-large shrimp (21 to 25 count), peeled and deveined
2 teaspoons soy sauce
3 medium cloves garlic, minced
1 TBS fresh ginger, minced
3 tablespoons peanut oil or vegetable oil
½ cup roasted peanuts
1 medium red bell pepper, cut into ½-inch dice
3 medium scallions, sliced thin

Directions: Toss shrimp with soy sauce in medium bowl; marinate until shrimp have absorbed flavors, about 10 minutes. Mix garlic, ginger, and 1 tablespoon oil in small bowl; set aside. Mix chicken broth, oyster sauce, hot sauce, hoisin sauce, sesame oil, vinegar and cornstarch in small bowl or measuring cup; set aside.

Heat 1 tablespoon oil in a large skillet over high heat until just beginning to smoke. Add shrimp and cook, stirring about once every 10 seconds, until barely opaque, 30 to 40 seconds; add peanuts, stir into shrimp, and continue cooking until shrimp are almost completely opaque and peanuts have darkened slightly, 30 to 40 seconds longer. Transfer shrimp, and peanuts to a bowl; set aside.

Return skillet to burner and reheat briefly, 15 to 30 seconds. Add remaining 1 tablespoon oil, swirl to coat pan, and add red bell pepper; cook, stirring occasionally, until slightly softened, about 45 seconds. Clear center of pan, add garlic-ginger mixture, mash into pan with spoon or spatula, and cook until fragrant, 10 to 15 seconds; stir into peppers until combined. Stir broth mixture to recombine, then add to skillet along with reserved shrimp and peanuts; cook, stirring and scraping up browned bits on bottom of pan, until sauce has thickened to syrupy consistency, about 45 seconds. Stir in scallions; transfer to serving plate and serve immediately.

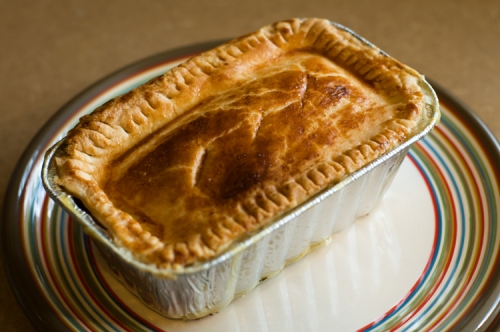
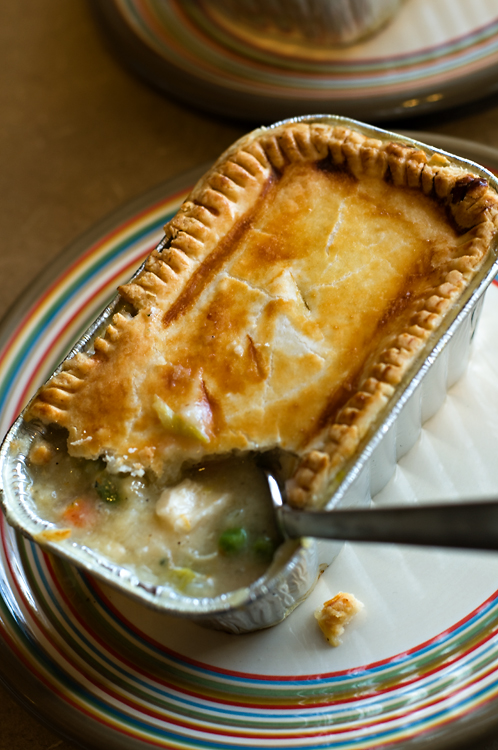
Freezer Chicken Pot Pies

potpie

Difficulty: Moderate

I can’t tell you how long it has been since I had a chicken pot pie! The ones I remember from my childhood were the frozen supermarket brand. This dish requires planning and a bit of effort, but the results will beat the pants off the stodgy supermarket pot pie from days past. Don’t be put off by the moderate rating, it is primarily due to time and prep work but anyone can do it!

*This recipe must be frozen prior to baking, otherwise the sauce will still be too soupy. Hence the need to plan ahead!
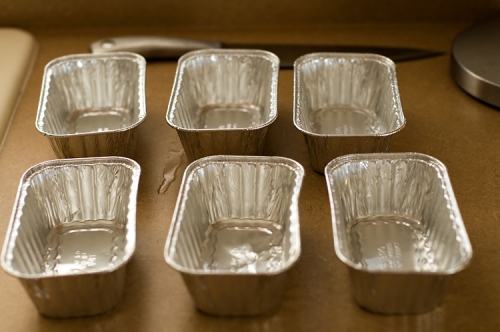
You will need 6 disposable aluminum mini-loaf pans (should hold approximately 2 cups).

Ingredients
3 boneless, skinless chicken breasts
S & P
2 TBS vegetable oil
5 1/2 cups chicken broth (or 5 1/2 cups water + 5 1/2 tsp chicken bouillon, this is what I had on hand)
2 TBS butter
1 onion, chopped fine
3 carrots, peeled and chopped
2 celery ribs with greens, chopped
3 large cloves garlic, minced
1/2 cup flour
1/4 cup milk
2 tsp fresh thyme, minced
2 TBS fresh lemon juice
2 (15-ounce) boxes ready made pie crust
1 egg, beaten, plus 1 add’l egg when ready to bake
1 1/2 cups frozen peas, do not thaw

Directions:
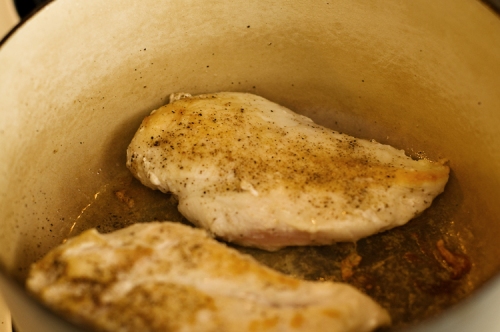
Assembly: Season chicken breast liberally with kosher salt & pepper. Heat 1 TBS oil in large Dutch oven over medium-high heat. Cook chicken until well browned, about 2 1/2 minutes each side. Add broth and bring to a boil, cover and simmer until chicken is cooked through, about 8 minutes. Place chicken on a plate and strain broth into a bowl.

 potpie-chicken1 potpie-veggies1

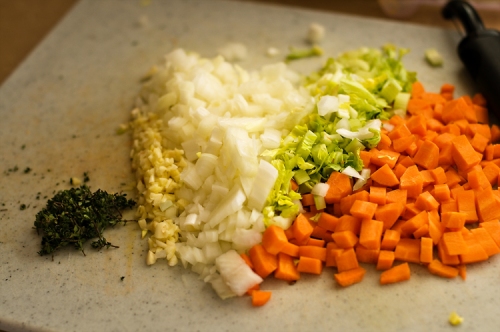
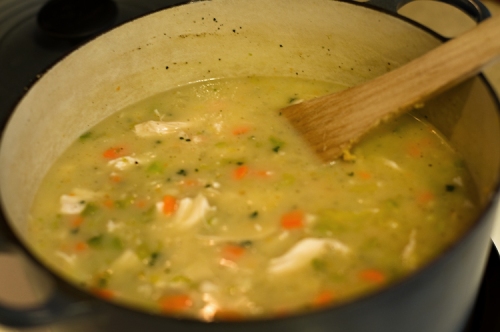
Melt butter with remaining 1 TBS oil in now empty Dutch oven over medium-high heat. Cook carrots, celery, onion until lightly browned and softened, seasoning with salt and pepper to taste. Reduce heat to medium, add flour and stir to combine, cook 1 minute. Add broth, milk and thyme. Simmer until sauce thickens, about 8 minutes.

potpie-filling1

Meanwhile, shred chicken breasts into bite-sized pieces. Toss with lemon juice and add to broth. (Taste and adjust seasonings accordingly, since I used the bouillon I did not need additional salt, just a bit more pepper for my liking. Use your tongue to guide you.) Transfer filling to bowl and let cool while you prepare the crusts.

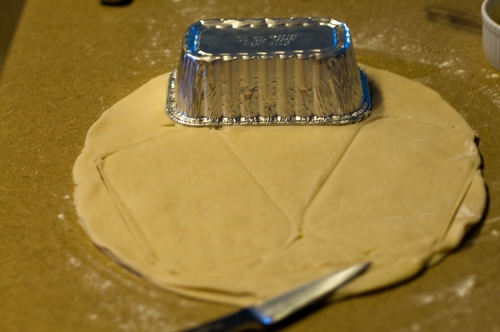
Unwrap and unroll the pie crusts. Place one crust on the counter and brush with some of the beaten egg with a pastry brush. Place the second pie crust on top and press gently. Using a aluminum pan turned upside down, cut out 3 pastry toppings from the double-thick pie dough. Repeat with 2 more pie crusts. Set aside.

potpie-crust potpie-pans

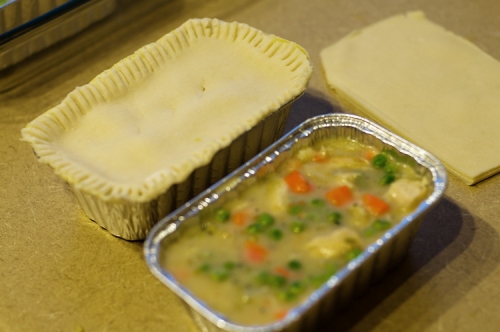
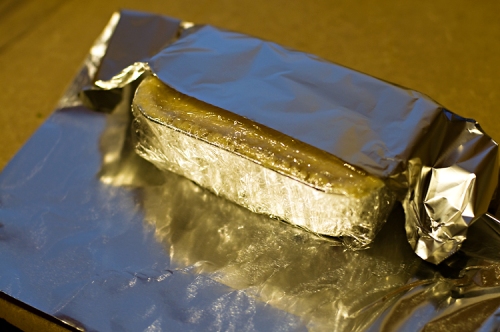
Return back to the filling, which will still be hot, and add the frozen peas.To speed the cooling process, use a ladle to evenly distribute the filling among the 6 aluminum pans. Place 1 piece of pastry over the filling in each pan and use a fork to seal the edges. Using a paring knife, cut 3 stem vents in each crust. Tightly wrap each loaf pan in 2 layers of plastic wrap and 1 layer of foil. Freeze for up to 2 months.

potpie-assembly potpies-foil

When ready to serve: Adjust oven rack to middle position and heat to 400 degrees. Unwrap frozen pot pies and place on rimmed baking sheet. Brush crusts with 1 beaten egg, cover with foil and bake for 40 minutes. Uncover and bake until crusts are golden brown, about 35 minutes more. Remove from oven and let rest for 10 minutes before serving. Dig in and moan and groan as you are eating because it is that good!

potpie-21

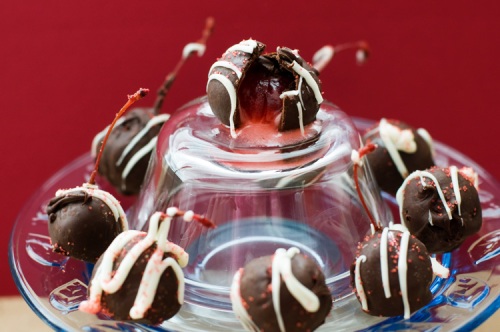
Chocolate Covered Cherries

chocolate-cherries

Difficulty: Hard

Ingredients
3 jars Maraschino Cherries with stems, drained, 3-4 TBS juice reserved
3 TBS butter, softened
3 TBS light corn syrup
3 cups powdered sugar
1/2 tsp almond extract
2 12-oz. bags semi-sweet chocolate chips
6 oz. white chocolate chips
2 TBS shortening

Directions: For the cherries: Drain cherries but do not pat dry. Place on large plate or cookie sheet and place in freezer for at least one hour and until ready to use.

For the fondant: Combine powdered sugar, butter, corn syrup, almond extract and 3 TBS cherry juice in large bowl with mixer. You will need to use your hands at the end to combine thoroughly, mixture may be sticky, dust with powdered sugar to handle. Roll into 6-inch disk and place between 2 large sheets of wax paper. Flatten with rolling pin to 1/8-1/4-inch thick. Place in freezer until ready for use, at least 30 minutes.

Assembly: Remove both cherries and fondant from freezer. Using a butter knife cut fondant into 1 1/2-inch squares and wrap each square around cherry. This is best accomplished when fondant and cherry are very cold, the heat of your hands will warm fondant making it sticky, you will need to return it to the freezer and do this in batches, or have lots of help! Continue wrapping fondant around the cherries. Place back on plate/cookie sheet and return to freezer.

Melt the semi-sweet chocolate with shortening in medium bowl, stir until smooth and shiny. Quickly dip cherries into chocolate making sure the fondant is completely covered. Place on wax paper lined cookie sheet or platter. The dipping is easiest when the stems remain on the cherries, that ideal is not always realized. I had a handful of cherries without stems, I stuck a toothpick in them to dip. Make sure after dipping that the cherry is completely covered so the fondant and juices do not leak out as the cherries “ripen”. When cherries are all covered with chocolate, melt white chocolate chips and place in small zip-loc baggie. Trim off a very small amount on the corner and drizzle over the cherries as you see fit. Refrigerate for a quick-set or let sit for a few hours. Store in an air-tight container and let rest for 3 days so the cherry juice and fondant can combine and create a nice creamy center. Will keep for 2 weeks if they last that long!

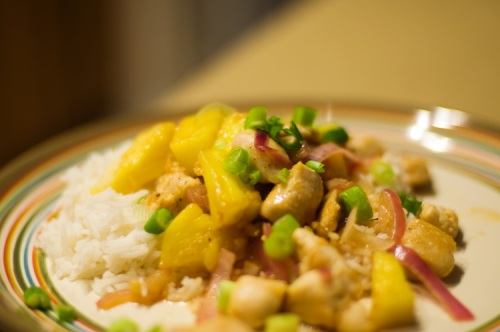
pineapple-chicken-stir-fry

Difficulty: Moderate

Serves 4

Fresh pineapple really makes a difference in this recipe. Half of one large pineapple will yield about 2 cups of chunks. But if the pineapple that is available isn’t ripe, or you are in a rush, then look for already cut-up fresh pineapple in the produce section of your market. Turn to canned pineapple only as a last resort, and make sure that it is packed in juice, not syrup. Because we like pineapple I used the whole darn thing. And it was delicious!

Ingredients
6 tablespoons red wine vinegar
6 tablespoons orange juice
6 tablespoons sugar
3 tablespoons ketchup
1 teaspoon cornstarch
1 pound boneless, skinless chicken breasts, trimmed
2 tablespoons vegetable oil
1 large red onion, halved and sliced 1/4 inch thick
2 cups fresh pineapple chunks (14 ounces)
3 cloves garlic, minced
1 tablespoon grated ginger
2 scallions, sliced thin
S & P

Directions: Whisk the vinegar, orange juice, sugar, ketchup, and cornstarch together in a small bowl and set aside.

Pat the chicken dry with paper towels and slice it into 1/2-inch wide strips, season with salt and pepper. Heat 1 tablespoon of the oil in a 12-inch nonstick skillet over high heat until just smoking. Add the chicken and cook until no longer pink, about 3 minutes. Transfer to a bowl.

Add the remaining 1 tablespoon oil and heat over medium heat until shimmering. Add the onion and cook until just beginning to soften, about 2 minutes. Add the pineapple and cook until heated through, about 1 minute.

Stir in the garlic and ginger and cook until fragrant, about 15 seconds. Whisk the vinegar mixture to recombine, then add with the chicken to the skillet. Toss until all the ingredients are well coated with sauce. Sprinkle with the scallions before serving.

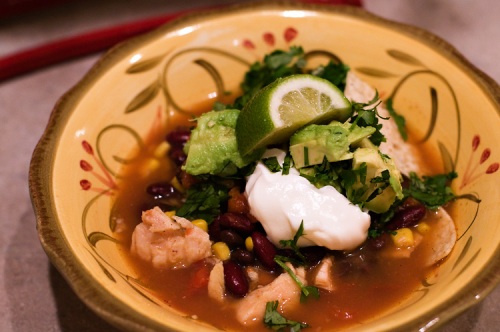
Taco Soup

taco-soup

Difficulty: Easy

It can’t get any easier than taco soup. A pantry meal at it’s finest! Top this quick concoction with fresh ingredients like creamy avocado, cool sour cream and fresh cilantro and you will soon take it to the next level. Hearty with 3 kinds of beans, tender chicken, corn, sharp cheddar cheese and the crunch of tortilla chips. Satisfaction in a bowl. Definitely a family favorite in our home. This recipe will feed a crowd (approximately 10 or so) or you will have leftovers, which is never a bad thing. Phil and I can stretch this for a few days and have happy lunches.

Ingredients
1 can kidney beans
1 can black beans
1 can pinto beans
2 cans corn
2 cans diced tomatoes
3 cans chicken breast
1 taco seasoning packet
1 1/2 tsp ground cumin
1 1/2 tsp chili powder
1/2 tsp granulated garlic
3/4 tsp onion powder
Salt & Pepper

Sour cream
Corn tortilla chips
Sharp cheddar cheese, grated
Fresh cilantro, chopped
2-3 avocados, diced
Limes, cut into wedges for serving

Directions: Dump all canned goods into a large pot, do not drain anything. Add 2 cans water. Add taco seasoning packet and remaining spices, stir to combine. Bring to a simmer over medium high heat. Taste and adjust seasonings as needed, finishing with salt and pepper to taste. The additional seasonings are approximate, add more or less according to your taste.

To serve crush a handful of tortilla chips in bowl, top with cheese and the taco soup. Serve with a healthy dollop of sour cream, a good sprinkling of cilantro, avocado and lime. Dig in!

Chicken w/ Spinach Pesto Sauce

chicken-pesto2

Difficulty: Easy

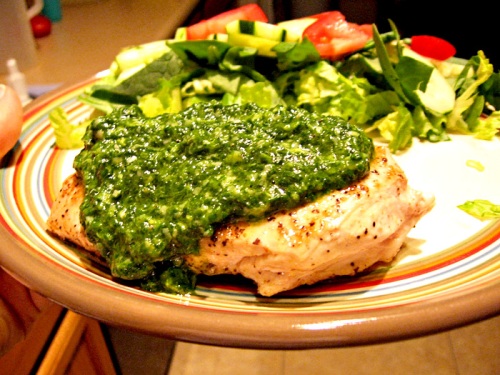
An easy, fresh and healthy weekday meal is just a short time away! Whip up the pesto in your food processor, saute the chicken, throw together a salad and a veggie and voila! Dinner served. A nice way to get your veggies in, this pesto packs a punch with loads of nutrient-rich spinach, bright flavors from lemon, garlic and Parmesan. Great with pasta too. If you don’t have pine nuts, walnuts are easily substituted. Serves 4.

Ingredients
4 boneless chicken breasts, about 6-oz. each
3 cups lightly packed baby spinach leaves
1/4 cup pine nuts, toasted
2 cloves garlic, smashed
2 tablespoons fresh lemon juice
1 to 2 teaspoons grated lemon peel
1/3 cup olive oil
Salt and freshly ground black pepper
1/3 cup freshly grated Parmesan

Directions: Heat a large skillet on medium high heat. Lightly oil the pan. Sprinkle the chicken with salt and pepper. Cook the chicken until the juices run clear, about 5 minutes per side.

Combine the spinach, pine nuts, lemon juice, and lemon peel in a processor. Lightly pulse. With the machine running, gradually add 1/3 cup of the oil, blending until the mixture is creamy. Add salt and pulse. Transfer the spinach mixture to a medium bowl. Stir in the Parmesan. Season the pesto with salt and pepper, to taste.

Spread the about two tablespoons pesto over each piece of chicken and serve. Refrigerate remaining pesto for use later in the week, toss with pasta for dinner to accompany chicken or freeze in an ice cube tray and transfer to an airtight container for long term storage (about 1 month).